 EN
EN

Q: Troubleshooting 'Air Leaks' in valve manifolds: Checking gaskets and mounting torque.
In B2B industrial operations, compressed air leaks are a silent profit killer. According to energy audits, the average manufacturing plant loses 20 to 30 percent of its total compressed air capacity to leaks. Among the most common locations for these leaks are pneumatic solenoid valve manifolds.
A leak in a manifold system does more than just waste expensive electrical energy at the compressor. It drops the system operating pressure, leading to sluggish actuator response, and can cause cross-port contamination where air bleeds between adjacent stations, causing cylinders to drift or actuate erratically. Below, the AIRWORK technical engineering team provides a structured, field-tested troubleshooting protocol to locate, diagnose, and resolve air leaks in valve manifolds, focusing on gasket maintenance, torque sequences, and mounting precision.
1. Common Symptoms of Manifold Air Leaks
Unlike individual tube fittings which are easy to diagnose, a leak inside a complex multi-station valve manifold can be deceptive. Typical signs of a manifold leak include:
- A constant, low-frequency hissing sound coming from the valve cabinet, even when the machine is in an idle state.
- A specific air cylinder that lacks the force needed to clamp or lift, caused by pressure loss at its corresponding manifold station.
- Erratic movement of adjacent cylinders: If air is leaking internally between manifold stations (known as cross-port leakage), activating Valve 3 might cause Cylinder 4 to twitch because pressurized air is seeping into Cylinder 4's working port.
2. The Primary Causes of Manifold Leaks
In 90 percent of cases, manifold leaks are not caused by defects in the aluminum block itself, but rather by errors during assembly or maintenance. The three primary culprits are:
Damaged or Misaligned Gaskets
Between the bottom of each solenoid valve and the top of the manifold block sits a specialized rubber gasket. This gasket features precut openings that match the supply, working, and exhaust ports of the valve. If this gasket is pinched during installation, dirty, or misaligned, pressurized air will easily find a path past the rubber barrier.
Incorrect Mounting Torque
Solenoid valves are secured to the manifold using steel mounting screws (typically M3 or M4 thread).
- Under-tightening: If the screws are not tightened sufficiently, the rubber gasket will not be compressed enough to form a positive seal against the micro-textures of the aluminum block. Under pressure, the gasket can blow out or seep air.
- Over-tightening: This is a highly common error among field technicians. Over-tightening the mounting screws can warp the valve's aluminum base, crack plastic housing components, or tear and crush the delicate rubber gasket, creating permanent leak paths.
Thermal and Vibrational Seep
In high-frequency packaging or stamping machinery, the rapid shifting of valve spools creates constant microscopic vibrations. Over months of operation, these vibrations can back out mounting screws. Additionally, significant temperature fluctuations in the factory cause the aluminum manifold, steel screws, and rubber gaskets to expand and contract at different rates, loosening the seal over time.
3. Systematic Troubleshooting Protocol
If you suspect a leak in your valve manifold, follow this step-by-step diagnostic and repair sequence:
- Step 1: The Soap-Bubble Leak Test: Before disassembling anything, locate the exact source of the leak. Mix a solution of liquid dish soap and water in a spray bottle. With the manifold fully pressurized, spray a light mist onto the seams between the valves and the manifold block, and around the threaded fittings. The escaping air will instantly form large, distinct bubbles, revealing the exact leak interface.
- Step 2: Depressurize and Disassemble: Shut off the air supply and exhaust all trapped pressure from the system. Using a matching hex key or screwdriver, remove the mounting screws of the leaking valve and lift it off the manifold base plate.
- Step 3: Inspect the Gasket and Sealing Faces: Carefully peel off the rubber gasket. Inspect it under bright light. Look for pinches, cuts, swelling (caused by incompatible chemical solvents), or flat spots. Clean the bottom surface of the valve and the top surface of the manifold block using isopropyl alcohol. Even a tiny speck of metal dust or dried grease can prevent a gasket from sealing properly. If the gasket shows any signs of wear, replace it with a fresh OEM gasket.
- Step 4: Re-align and Torque Using a Cross-Pattern: Place the clean, dry gasket back onto the manifold, ensuring all port holes align perfectly with the metal ports. Lower the valve onto the gasket. Hand-tighten the mounting screws first to ensure they are not cross-threaded.
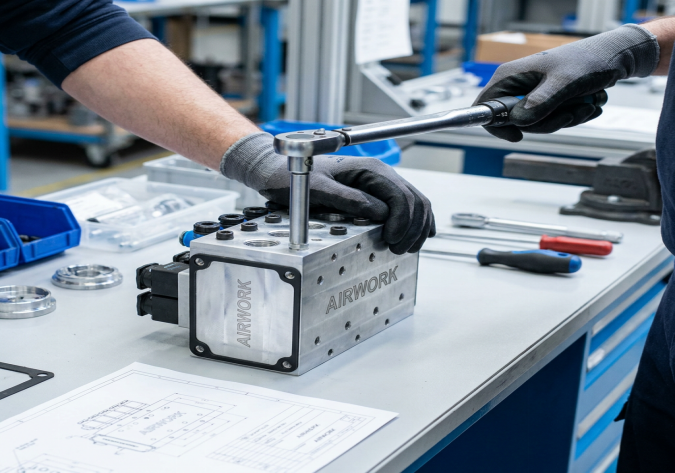
- Step 5: Apply the Correct Torque Specifications: Using a torque screwdriver, tighten the mounting screws in an alternating, diagonal sequence (cross-pattern) to distribute pressure evenly. Do not tighten one screw completely before starting the other. Apply the following recommended torque specs:
- M3 Screws: 0.5 to 0.7 Newton-meters (Nm)
- M4 Screws: 1.0 to 1.2 Newton-meters (Nm)
4. Preventing Future Manifold Leaks
To ensure long-term, leak-free operation in your B2B installations, implement these preventative measures:
- Use Thread-Locking Compounds: For high-vibration applications, apply a tiny drop of low-strength, removable thread-locking adhesive (such as blue Loctite) to the valve mounting screws. This prevents the screws from backing out due to mechanical vibration while still allowing easy disassembly for future maintenance.
- Perform Scheduled Torque Checks: Include manifold screw checks in your semi-annual preventative maintenance checklists. Use a calibrated torque wrench to ensure screws have not loosened due to thermal cycling.
- Avoid Chemical Contaminants: Ensure that the lubricants used in your air lines are compatible with NBR and HNBR rubber gaskets. Petroleum-based sprays can cause the gaskets to swell, warp, and leak.
The AIRWORK (JZPNU) Advantage
At Zhejiang Jinzhi Pneumatic Technology Co., Ltd. (JZPNU), we engineer our AIRWORK brand manifolds and valves for absolute sealing integrity:
- Precision-Milled Sealing Seats: Our CNC machining centers mill the manifold mating surfaces to ultra-flat tolerances, eliminating any surface warping and ensuring an airtight seal with minimal gasket compression.
- Pre-Shaped Anti-Slip Gaskets: Our custom gaskets are manufactured from high-grade elastomeric compounds designed to resist compression set, chemical swelling, and extreme temperatures. Many of our gaskets feature molded ridges that lock into recesses on the valve body, preventing alignment errors during field assembly.
By following this structured diagnostic approach and choosing high-precision AIRWORK manifold systems, you can quickly eliminate wasteful air leaks, optimize system pressure, and keep your automated production lines running at peak B2B efficiency.
Table of Contents
- Q: Troubleshooting 'Air Leaks' in valve manifolds: Checking gaskets and mounting torque.
- 1. Common Symptoms of Manifold Air Leaks
- 2. The Primary Causes of Manifold Leaks
- Damaged or Misaligned Gaskets
- Incorrect Mounting Torque
- Thermal and Vibrational Seep
- 3. Systematic Troubleshooting Protocol
- 4. Preventing Future Manifold Leaks
- The AIRWORK (JZPNU) Advantage